Support
Do you have a manual for ShaperBox 3?
Yes, we do. Download our in-depth ShaperBox 3 PDF manual for full usage instructions and an in-depth guide to all features and functions.
The manual covers PitchShaper, ReverbShaper, TimeShaper 3, DriveShaper 2, NoiseShaper 2, FilterShaper Core 3, LiquidShaper, CrushShaper 2, VolumeShaper 7, PanShaper 4, WidthShaper 3.
Do you have video tutorials for ShaperBox 3?
Yes! Some of these videos feature older plugin versions – all techniques still apply to ShaperBox 3.
Also check out our YouTube channel, where you'll find lots of additional tips-'n'-tricks videos.
Core Tutorials

Introduction to ShaperBox 3

The Ultimate Guide to ShaperBox LFOs

Introduction to PitchShaper

Introduction to ReverbShaper

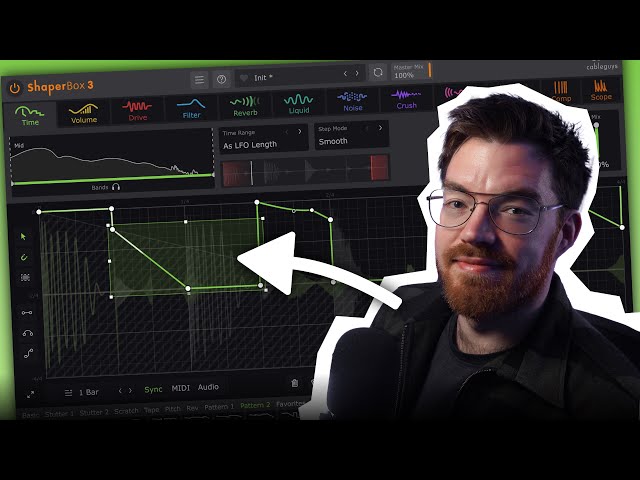
TimeShaper: The Ultimate Guide

How To Use NoiseShaper

NoiseShaper Drum Noises How-To

How To Use DriveShaper

How To Use ShaperBox's Oscilloscope

FilterShaper Core Creative Tricks
Creative Techniques

Design a unique riff

Invisible sidechaining for loud mixes

Lift the kick drum from a loop

Remove hi-hats from any loop

The half-speed effect

Add stereo energy to mono drums

Super-stereo risers

Instant in-time scratch FX
Can I import my own NoiseShaper noise samples and ReverbShaper impulse responses into ShaperBox?
Yes, you can! Please open the ShaperBox Main Menu, and click the ‘Show User Noise Folder’ or ‘Show User Reverb Folder’ entry for instructions on how to import your own noise samples and reverb IRs.
How do I route audio to ShaperBox's external sidechain input?
To trigger ShaperBox's LFOs, Envelope Followers or Compressor with an external input signal (ie, any track in your DAW other than the one hosting the plugin), you'll need to route that signal to the External Sidechain Input. Here's how to do it for audio triggering, specifically, in the most popular DAWs.
For the Envelope Followers and Compressor, follow the instructions for routing the External Sidechain signal into the plugin, then simply activate the External Sidechain option in the Envelope Follower / Compressor section on the right hand side of the plugin.
Ableton Live
- In ShaperBox's LFO Settings bar, click the 'Audio' button, then the External Sidechain button, to switch to Audio Trigger mode and activate the external sidechain.

- In Live's Device View for the ShaperBox plugin, select the track that you want to trigger the LFO with in the 'Sidechain' menu.

- Start playback and the LFO will be triggered by the transients in the external signal. To tailor the transient detection, open the Global Audio Triggering Setup panel by clicking the cogwheel icon in the LFO Settings bar.

Bitwig Studio
- In ShaperBox's LFO Settings bar, click the 'Audio' button, then the External Sidechain button, to switch to Audio Trigger mode and activate the external sidechain.

- In the Device View panel for ShaperBox, click the 'Show Plug-in Sidechain' button to reveal the sidechain input selector, and select the track that you want to trigger the LFO with from the menu.

- Start playback and the LFO will be triggered by the transients in the external signal. To tailor the transient detection, open the Global Audio Triggering Setup panel by clicking the cogwheel icon in the LFO Settings bar.

Steinberg Cubase
- In ShaperBox's LFO Settings bar, click the 'Audio' button, then the External Sidechain button, to switch to Audio Trigger mode and activate the external sidechain.

- In the top bar of the ShaperBox plugin window, click the 'Set up Side-Chain routing' button (cogwheel icon), then 'Add Side-Chain Source' in the panel that appears, and select the track that you want to trigger the LFO with as the Side-Chain Input.

- Click the 'Activate/Deactivate Side-Chaining' button to the left of the 'Set up Side-Chain routing' button to turn on the sidechain, then start playback to have the LFO triggered by the transients in the external signal. To tailor the transient detection, open the Global Audio Triggering Setup panel by clicking the cogwheel icon in the LFO Settings bar.

FL Studio
- In ShaperBox's LFO Settings bar, click the 'Audio' button, then the External Sidechain button, to switch to Audio Trigger mode and activate the external sidechain.

- In the FL Studio Mixer, select the channel hosting the signal you want to use as your sidechain input, then right-click the little upward arrow at the bottom of the channel strip hosting ShaperBox and select 'Sidechain to this track' if you want the triggering track to be audible or 'Sidechain to this track only' if you don't.

- Click the 'Detailed Settings' (cogwheel icon) button at the top left of the ShaperBox window, then the 'VST Wrapper Settings' button (plug and cogwheel icons), then the 'Processing' tab. There, set the '2. Sidechain' setting to the sidechain input channel number ('1' in our case) and click the radio button to the right to activate the sidechain.

- Start playback and the LFO will be triggered by the transients in the external signal. To tailor the transient detection, open the Global Audio Triggering Setup panel by clicking the cogwheel icon in the LFO Settings bar.

Logic Pro
- In ShaperBox's LFO Settings bar, click the 'Audio' button, then the External Sidechain button, to switch to Audio Trigger mode and activate the external sidechain.

- In the top bar of the ShaperBox window, select the track that you want to trigger the LFO with in the 'Sidechain' menu.

- Start playback and the LFO will be triggered by the transients in the external signal. To tailor the transient detection, open the Global Audio Triggering Setup panel by clicking the cogwheel icon in the LFO Settings bar.

Maschine
- In ShaperBox's LFO Settings bar, click the 'Audio' button, then the External Sidechain button, to switch to Audio Trigger mode and activate the external sidechain.

- In the Control Area of the Sound or Group into which ShaperBox is inserted, click the 'Side-Chain Input' tab, then select the track that you want to trigger the LFO with from the 'Source' menu in the 'Input' area.

- Start playback and the LFO will be triggered by the transients in the external signal. To tailor the transient detection, open the Global Audio Triggering Setup panel by clicking the cogwheel icon in the LFO Settings bar. If the trigger signal is too loud in the sidechain input (ie, the waveform in the Global Audio Triggering display appears clipped), simply lower the 'Gain' knob in the 'Input' section.

Pro Tools
- In ShaperBox's LFO Settings bar, click the 'Audio' button, then the External Sidechain button, to switch to Audio Trigger mode and activate the external sidechain.

- In order to feed the kick drum into ShaperBox's sidechain input, we need to route it to a Bus in Pro Tools. Click a Send slot on the channel that you want to use as your sidechain input and set it to any Bus – we've gone for 'Bus 1' here. A send amount fader will pop up – set it to '0', as shown here.

- Click the 'Key Input' menu in the top bar of the ShaperBox interface (currently set to 'no key input') and select the Bus you routed the kick drum to in the previous step.

- Start playback and the LFO will be triggered by the transients in the external signal. To tailor the transient detection, open the Global Audio Triggering Setup panel by clicking the cogwheel icon in the LFO Settings bar. If the trigger signal is too loud in the sidechain input (ie, the waveform in the Global Audio Triggering display appears clipped), simply lower the Send amount fader.

Reaper
- In ShaperBox's LFO Settings bar, click the 'Audio' button, then the External Sidechain button, to switch to Audio Trigger mode and activate the external sidechain.

- In the Mixer, click the 'Route' button on the channel you want to trigger the sidechain with. In the panel that pops up, click the menu in the Sends section that currently reads 'Add new Send', and select the track hosting ShaperBox.

- Click the output menu (the one with the right-pointing arrow to its left, currently displaying '1/2') and select '(New channels on receiving track)> 3/4'.

- Start playback and the LFO will be triggered by the transients in the external signal. To tailor the transient detection, open the Global Audio Triggering Setup panel by clicking the cogwheel icon in the LFO Settings bar.

Studio One
- In ShaperBox's LFO Settings bar, click the 'Audio' button, then the External Sidechain button, to switch to Audio Trigger mode and activate the external sidechain.

- Click the 'Sidechain Sources' (the right-pointing arrow icon next to the 'Sidechain' button) button at the top centre of the ShaperBox window and check the 'Send' or 'Output' box for the channel you want to trigger the sidechain with, depending on whether or not you want the triggering audio signal to be audible in the mix. If you check the 'Output' box, the signal will be sent directly to ShaperBox's sidechain input, so you won't hear it.

- Check the 'Send' box, on the other hand, and a small slider will appear on the channel strip with which to set the amount of triggering audio signal sent to the sidechain input in parallel with the audible output, so you'll still hear the triggering audio signal in the mix. By default, this slider is set to 0dB, which means the full signal is being sent, so you probably won't need to change it.

- Click the 'Sidechain' button to activate it if it hasn't done so automatically, then start playback and the LFO will be triggered by the transients in the external signal. To tailor the transient detection, open the Global Audio Triggering Setup panel by clicking the cogwheel icon in the LFO Settings bar.

Common plugin issues
All plugins from all vendors that are position-synced are affected by Ableton Live's known timing issues. For a workaround, check our Support article.
For any other issues, please check our Support pages – there's a good chance that the answer is already there.
