The No-Nonsense Guide to Sidechaining
Kick and bass clashing? Learn how to solve it with sidechaining, from compressor basics to modern volume-shaping techniques.
November 12, 2026, by Ronan Macdonald

Why your kick and bass don't work
The low end is where great mixes are won or lost – and when I was editing Computer Music magazine in the early 2000s, sidechaining began emerging as one of those techniques that separated the pros from everyone else.
It quickly became clear why so many of the producers we featured in the magazine swore by it: kick and bass occupy the same foundational frequency range. That means every time they land together, they're working against each other rather than with each other.

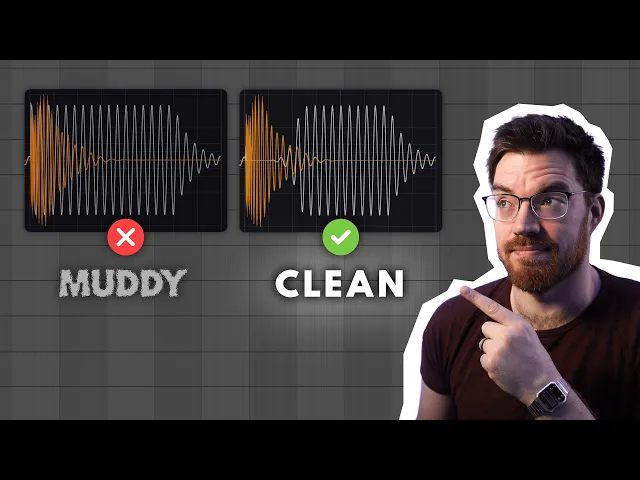
When your kick and bass don't give each other the space they need, you get a destructive pile-up of low-frequency energy: a muddy bassline, a weakened kick, and a mix that won’t “go loud” without falling apart.
The solution is sidechaining – a technique that carves out space for each element so both can hit with full force, just never at exactly the same moment.
Getting that knowledge out to Computer Music readers felt important – and years later, sidechaining is still essential for getting tight, locked-in low end, just like on your favourite records.
What sidechaining actually does
So what, exactly, is sidechaining?
In simple terms, it’s the “ducking” in volume of one sound – usually the bass – whenever a trigger sound – usually the kick drum – is present. The result is that the kick punches through cleanly and in full force, every time.
It's a powerful and versatile technique that’s also useful well beyond the low end – for adding clarity to vocals, creating rhythmic gating effects, and much more. Every producer should have it in their toolkit.
There are several ways to apply sidechaining, and I'll walk you through each in this guide. I'll focus on kick/bass ducking as the main example throughout, as it's both the most common use case and the clearest way to see the technique in action. But everything you’ll see can be applied to other sounds too.
I'll also point you to a wealth of informative and inspirational sidechaining videos by my colleague Joe. Let's kick off with his quick primer on why sidechaining is such an essential thing to get a handle on:

The OG ducker: sidechaining with a compressor

Back in the day, 'sidechain ducking' involved routing one signal into a compressor's sidechain input to trigger the compression (ie, gain reduction) applied to another signal routed to the main input.
And even though there are now far more convenient and lower-maintenance options available (that we'll come to shortly), the compressor is still a wholly viable option for fitting frequency-sharing parts around each other.
Setting up a compressor for sidechaining
Setting up a compressor for sidechain ducking can be a little fiddly, depending on how your DAW handles audio signal routing and the complexity of the compressor itself. Let's see how it's done.
Here's a kick drum and bassline that totally overwhelm the low end when both are present at the same time.
Our aim is to sidechain duck the bass so that it drops in volume whenever the kick drum hits. Here's how to set it up:
- Insert your compressor plugin into the bass channel, since that's the signal we're looking to compress/duck.
- Open the compressor's Sidechain menu or panel (see our setup guides for DAW-specific instructions).
- Select the kick drum channel as the sidechain input.
Now, the kick drum is routed into the sidechain, so that the compression circuit responds to it rather than the bass. The resulting compression, however, is still applied to the bass.
Threshold and Ratio
The Threshold control sets the volume level that the kick has to exceed to trigger compression, while the Ratio determines the amount of compression applied. There are no 'right' settings here, but start with the Threshold all the way down and the Ratio all the way up, and back them off until you get the ducking you're after.

Attack and Release
The Attack and Release controls determine the ‘speed’ with which ducking is applied to and then backed off from the bass when the kick drum hits. You'll generally want to keep the Attack at its lowest (fastest) setting, and adjust the release to control how quickly the bass rises back up in level after the kick drum has struck.
Remember, the compressor follows the shape of the kick drum, so the settings you use will be different from track to track, depending on the shapes of their kicks.
Tip: Set the Attack to the fastest timing if you want the bass to get out of the way the instant the kick drum transient arrives, or make it longer if you want to keep the initial bass 'pluck' loud and proud.
Tip: Set a short Release time to bring the bass back up as quickly as possible after the kick drum has made its point. For a more pumping feel, with space between the kick drum hit and the upward arrival of the bass, go long with the Release.
Here, then, is my sidechain-compressed bassline. The kick now occupies its own space, as the bass ducks out of its way.
Sidechain filter
Many compressors have a sidechain filter – this controls which frequencies trigger the ducking.

There are three main use cases for this when ducking:
- Prevent a long kick from overreacting → High-pass above 200Hz to isolate just the attack.
- Isolate the kick drum in a loop → Low-pass to catch only the kick's sub frequencies.
- Trigger from the snare instead of the kick → Band-pass around 200-300Hz with some resonance to isolate it.
Key takeaway: A compressor delivers a very particular style of sidechaining, where the volume reduction follows the dynamic contour of the kick drum. Use the Attack and Release controls to control the speed with which the ducking starts and stops.
The problem with compression
Although the compressor is a solid option for sidechain ducking, it does have a few drawbacks.
- Sidechain detector response can be subtly inconsistent, so the amount and shape of ducking applied might differ from hit to hit.
- Because a compressor reduces the output volume by a ratio relative to the sidechain input volume, it won't ever reach complete silence.
- The sizeable array of controls can require a lot of tweaking to get the exact response you want, which may even turn out to not be achievable at all.
So a compressor ducks volume indirectly – you're setting thresholds and ratios and hoping it responds how you want.
Alternatives to compression: the modern way

Modern ducking tools like Kickstart and VolumeShaper avoid these problems. They let you directly apply a customisable curve.

Indeed, that's why dance music producers including David Guetta and deadmau5 began to switch to using DAW automation and volume modulation tools to achieve the tight bassline ducking that their hard-hitting choons demanded in the mid-2000s.
Automation: cheap and cheerful

As those early ducking pioneers realised, the automation system built into your DAW (and thus effectively free) gives you the ability to draw precise volume changes into your bass track and copy them throughout the song as required.
While this gives you very detailed control over your ducking, the downside, obviously, is that it can be a very long-winded approach, especially if you decide to adjust all those automation segments later.
Sidechain plugins

And in comparison to a compressor, sidechaining plugins such as these offer easier setup, the decoupling of the ducking curve from the shape of the sidechain signal, and greater consistency, as summed up by Joe in this video:

Kickstart and VolumeShaper both modulate the volume of the input signal with a user-defined LFO waveform, either cyclically at whatever rate you like, or triggered by an audio signal at the sidechain input.
The difference between them is that VolumeShaper gives you everything you need to create custom multiband volume modulation curves, while Kickstart presents a super-fast, stripped-back take on the same core ducking functionality, with a preset bank of horizontally adjustable ducking curves, rather than a full-on wave editor. Over to Joe once more!

Whichever one you go for, integrating ducking into your workflow becomes much easier when you have tools dedicated to the task at your fingertips. Let's put them to work…
Quick and easy sidechaining with Kickstart

Here's another problematic rhythm section. Take a listen to how the kick drum and bass are fighting for space:
Let's now duck the bass using Kickstart 2. First, I load Kickstart 2 onto the bass channel…
And that's that! All done.
Okay, I'm being glib, but one of the best things about Kickstart is that if your kick drum is squarely on quarter notes, the default setup might well be all you need to have the bass duck out of its way. A truly instant fix!
Choosing a preset curve
If the ducking doesn't sound quite how you want it, click through the left-most ten preset wave buttons to find one that better suits the track.

These preset ducking waveforms cover a range of modulation shapes, and can be fine-tuned. Hover over the waveform display and drag the yellow 'Slope' area left or right to change the timing and duration of the volume change, or use the Move Curve and Move Curve (Fine) buttons.

This enables you to tailor the ducking to the shape of the kick drum. You can see exactly what's happening to the signal via the grey and white waveforms in the oscilloscope: dark grey is the unprocessed input, light grey is the ducked output.
Here's how my bassline sounds now, with Kickstart's curve dialled in:
If you don't need the bass to disappear completely in order for your kick drum to hit the mark, you can turn down the big Mix knob, which controls the amount of volume modulation (ducking) applied.
Now the ducking is less obvious:
Invisible sidechaining with Band mode
For even more transparent sidechaining, though, click the Band button:

This lets you set a frequency from 20Hz to 5kHz, above which the signal won't be ducked. I've set it to about 300Hz here, which lets the kick punch through the low end without affecting the characterful higher frequencies in the bassline.
This gives so-called "invisible sidechaining", where the pumping becomes transparent and – with the right settings – practically inaudible.
Now we get tight, ducked low end, but the bassline's transients and midrange punch through fully:
Audio Trigger mode
So far, we've been using Kickstart 2 in Sync mode, which simply loops the modulation waveform at the rate set by the Length buttons at the top. This is fine if your kick drum is rolling along on quarter notes.
But what if your kick is playing a more elaborate, off-beat pattern, like this?
Here, we need to trigger the ducking pattern with the kick drum itself – and that's where Audio Trigger mode comes in.
To have the kick drum trigger Kickstart 2 every time it hits, use your DAW's sidechain system to route the kick channel into the plugin, then click the Audio button.

Now, you'll hear the bass duck in volume with every kick drum.
You'll also see both the kick drum (grey) and bass (yellow) waveforms in the oscilloscope. This provides a convenient visual reference for shaping the volume modulation around the kick using the Slope/Curve, Band and Mix controls.
Here's how my beat sounds now, with Audio Triggered ducking:
The End Marker
When Audio Trigger mode is active, the End Marker appears in the main display.

This sets the point at which playback through the ducking curve ends, and thus the level at which the output volume will stay until the next trigger signal arrives.
Unless you want your bass to drop in volume in between kick drum hits, make sure the End Marker is at a point where the curve is at the very top of the display – ie, full volume.
Key takeaway: Kickstart gives you instant sidechaining with minimal setup. Use Sync mode for four-to-the-floor patterns or Audio Trigger mode for irregular kicks, and activate the Band filter for transparent ducking.
Advanced sidechaining with VolumeShaper

While Kickstart makes sidechaining as quick and easy as it gets, VolumeShaper gives you much more in the way of control and finesse.
Once again, though, if your kick drum is four-square, you might just need to load ShaperBox and click the 'Sidechain' button in the VolumeShaper tile on the Shaper selection screen.

This opens VolumeShaper, with the LFO set to a 1/4-note ducking curve, and the 'Sidechain' section of the Wave Presets bar open.

Click through those Wave Presets to find a ducking curve that fits the shape of your kick and bass. The Oscilloscope in the Wave Editor shows the input signal waveform in grey, and the processed output signal in yellow.
The Wave Editor
The most obvious advantage that VolumeShaper has over Kickstart is the ability to freely edit and redraw the ducking curve in the LFO Wave Editor. Drag individual points to change the shape, and click in the Wave Editor to add new points if required.
To move the slope horizontally, drag a box around all the points that form the curve to select them, then drag it left or right.

Here's a before-and-after example of a clashing kick and bass: the first four bars are unprocessed, then the second four bars have VolumeShaper applying the ducking curve shown above to the bassline:
That's some pretty heavy ducking, so let's back it off a touch. The Mix slider sets the blend of dry and wet signal, so lower it from the default 100% to dial back the ducking effect. (You can also achieve the same thing by raising the 'floor' of your ducking curve.)

Multiband processing
The other big benefit of VolumeShaper is full multiband processing. Whereas Kickstart lets you set a cutoff frequency above which the signal remains unaffected, VolumeShaper gives you three fully adjustable frequency bands, each housing a separate volume modulation LFO.

Using this, you can, for example, fully duck the low frequencies while ducking the low-mids with a shallower curve and leaving the highs completely unaffected. Why might this be useful? Well, if you find that sidechaining your bassline detracts too much from the audibility of the actual notes it's playing, taking the higher frequencies out of the ducking process so that they remain unaffected is an easy way to bring the melody back.
The three frequency bands are set up by dragging the crossover handles in the Multiband Editor, and clicking a band switches the Wave Editor to the LFO for that band. You can see the LFO waveforms for the currently unselected bands faintly in the background of the Wave Editor.
Here's my sidechained bass again, this time with ducking only applied to the bassline below 310Hz:
Audio Trigger mode
Like Kickstart, VolumeShaper has an Audio Trigger function, which can be used to retrigger the curve with each kick drum – perfect for tracking irregular drum patterns.
By default, Audio Trigger mode follows the main input signal (ie, the bass, not the kick), so click the Audio button to activate Audio Trigger mode, then the Sidechain button to the right of that to switch to external triggering.
Plumb the kick drum channel into ShaperBox's sidechain input using your DAW's routing system, and the LFO will restart with every kick hit. With 'Show Ext. Sidechain' active, you'll see the kick drum's waveform overlaid in the Oscilloscope to aid in shaping the ducking curve around it.

The End Marker in the Wave Editor sets the point at which the volume modulation ends, which is where the output volume level will stay until triggered again. Make sure it's at a point where the curve is at the top of its range to ensure that the bassline stays at full volume after ducking, no matter how long the gaps are between kicks.

Global Audio Trigger Settings
Clicking the cogwheel icon next to the Audio button opens the Global Audio Trigger Settings panel. For simple kick/bass ducking, you probably won't need to adjust anything in here.

However, if your kick drum is part of a mixed drum loop, rather than sitting on its own channel, the Input Filter, Threshold and Detail controls make isolating it a snap.
ShaperBox integration
Of course, since VolumeShaper is part of ShaperBox, you can run your sidechaining alongside any or all of ShaperBox's other ten effects. When doing so – or when applying sidechaining of any kind in any effects chain – you're usually going to want to place VolumeShaper at the end of the chain, as it should generally be ducking the final, fully processed bass sound to have the desired effect.
One notable exception to this is when also using limiting or clipping in order to 'brickwall' the bass. In that case, the limiter or clipper should always come last – especially with multiband ducking, where subtle phase changes can cause volume level increases.

Key takeaway: VolumeShaper offers deep control over your ducking curves, with freely editable LFO waveforms, multiband processing, and tweakable audio triggering – all within the powerful ShaperBox multi-effects plugin.
And finally…
Let's wrap up with two longer-form videos from Joe, the first diving deeper into what I've covered in this guide, and the second presenting ten invaluable tips to help you take your sidechaining to the next level. And if you fancy taking your sidechaining adventures further, check out my 4 Ways to Use Sidechaining Beyond Kick and Bass.
Sidechaining Kick & Bass: BEGINNER to PRO
10 Sidechain Strategies for PERFECT Kick & Bass