How to Create Vinyl Scratching Effects With TimeShaper
Add spice to melodies, loops, vocals and more with this simple trick for designing realistic scratches using ShaperBox's most out-there effect.
November 12, 2026, by Ronan Macdonald

Back in the 80s and 90s heyday of classic rap and hip-hop, no track was complete without a DJ scratching and cutting vinyl, either as the main beat, or a distinct instrumental addition. The weapon of choice for this was the Technics SL-1200 turntable.
Through their deft vinyl manipulations, pioneers such as Grand Wizzard Theodore, DJ Kool Herc, Grandmaster Flash, Grand Mixer DXT, DJ Premier, DJ Qbert and Jazzy Jeff established the turntable as an instrument in its own right.
Scratching as a lead instrument might not be a thing in modern hip-hop, but vinyl scratches still have the power to enhance your beats. Drop one into a melody, drum track, sample, vocal – anything at all – and it can really catch your listener's ear.
Best of all, you can scratch any sound right inside your DAW using Cableguys TimeShaper for ShaperBox. Used in conjunction with a bit of faux crossfader cutting from ShaperBox's VolumeShaper, you can design convincing turntable tricks in just a few clicks.
Get the plugin
Don't own ShaperBox yet? No problem! You can follow the tutorial using the ShaperBox demo – it contains TimeShaper and VolumeShaper among the full roster of Shaper effects.
Basic DJ scratching
Let's start with some basic DJ scratching, using a TimeShaper LFO that keeps your scratches perfectly in time.
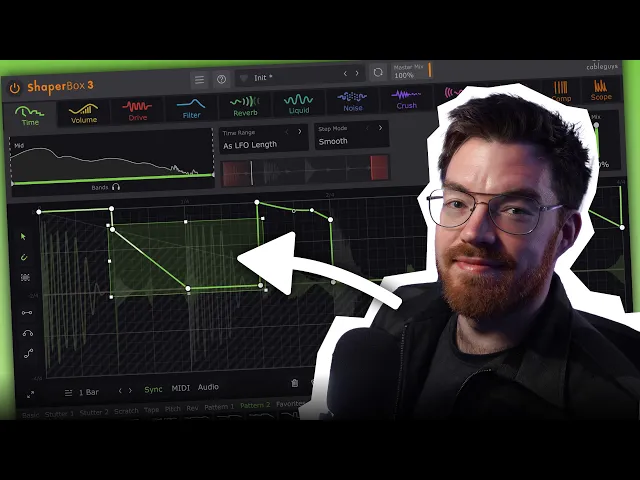
With TimeShaper loaded onto a drum loop or other sampled phrase, start by loading a waveform from the Stutter Wave Preset category, or drawing your own step sequence.
Then soften some of the hard points in the sequence, leaving hard points where you want to preserve the timing of the loop.

Next, turn on your DAW's metronome for timing reference, and move points around in the LFO waveform to shape a convincing scratching 'performance'.

Finally, define when each section of scratching starts and ends by automating TimeShaper's Mix control to jump between 0% and 100%.

Scratching and cutting
That's the fundamentals of scratching covered, then, but TimeShaper's virtual turntablist potential really becomes apparent when you start flipping between waveforms on the fly to emulate complex cutting and scratching.
This track features a pair of two-beat-long vocal samples, placed alternately at the start of each bar, which we want to manipulate just like a DJ would with a vinyl record. We start by drawing a horizontal line in TimeShaper's LFO Wave Editor along the centre line, starting at beat 3 of the one-bar Loop Length. This simply repeats the first half of the bar.

We want to scratch the first half of the bar, then have the vocal play unscratched in the second half. To do this, we draw a short curved sweep in the Wave Editor using the S-Curve Pen, then click three times to repeat the shape through four eighth notes.

Using TimeShaper's Pointer tool, we then move the points of the waveform around a little to introduce 'human' variation to the scratching performance. We're not aiming to achieve perfect timing at this point – just a more authentic feel.

Okay, here comes the secret sauce. A real-life DJ will cut the scratching in and out using the crossfader on their mixer, and we can faithfully emulate this using VolumeShaper. Simply draw in short volume cuts using the Line Pen, paying attention to their rhythm, which should be nice and tight. This is why you don't need to worry about rhythmic precision when drawing the scratches, as it's the crossfader movement that keeps everything in time.

Finally, deploy ShaperBox's MIDI Switch function to set up multiple variations on your TimeShaper and VolumeShaper LFO waveforms, and flip between them using MIDI notes to build a more complex, extended scratching performance.

Watch the video
To see these techniques in action, and learn much more about TimeShaper and the temporal tricks that can be pulled off with it, check out Joe's Ultimate Guide.